¶ Widgets
The data sources are accessed via widgets. A selection of these widgets can be found in the widget library. The widgets provide functions such as data visualization, remote control of devices and more.
¶ Widget-Packs
¶ Widget-Types
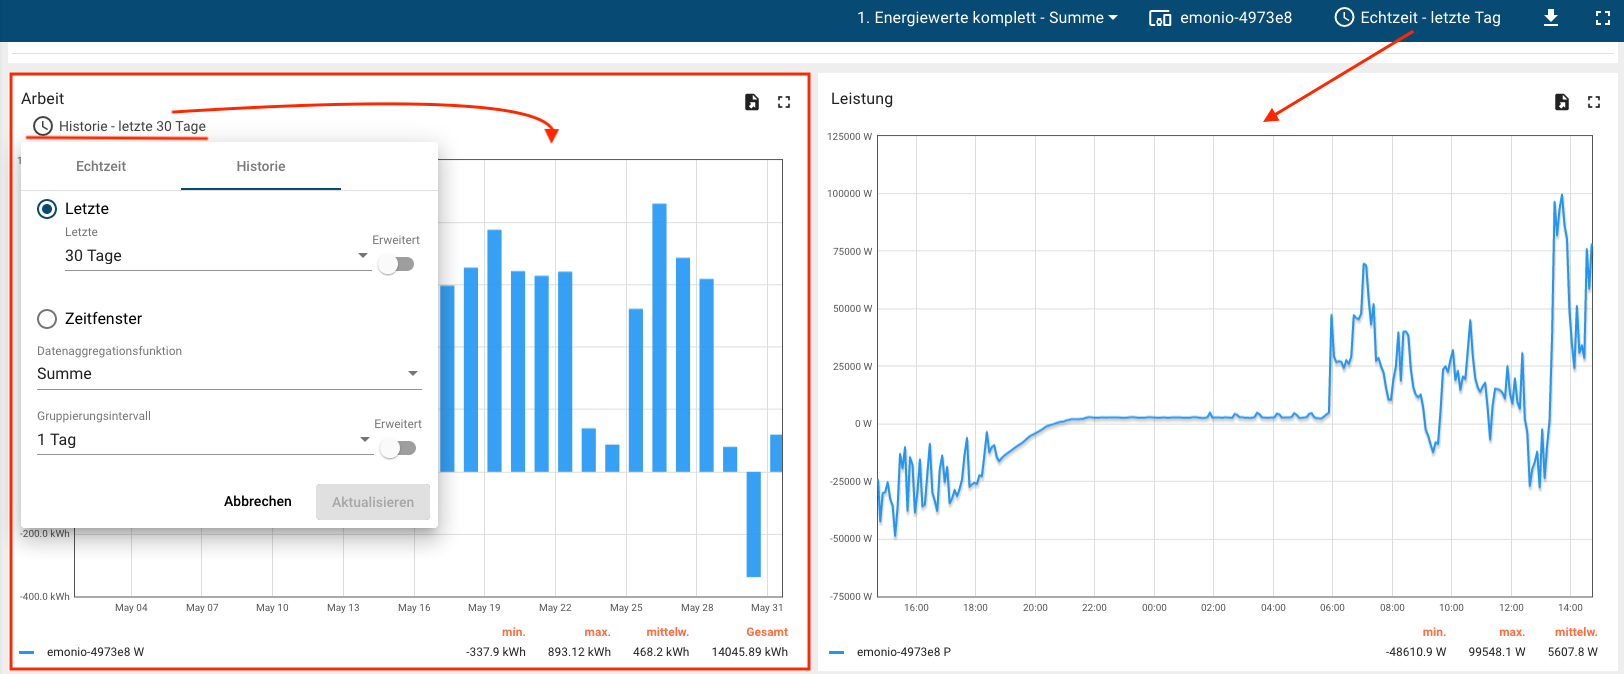
- Time series-Widgets display data over a specific period of time. The time window can be selected e.g. in real time or historically.
- Most recent value-Widgets display the most recent value of a specific attribute or time series.
- Control-Widgets allow you to send RPC commands to your device.
- Alarm-Widgets allow you to display alarms.
- Static-Widgets display static data, such as a site map, company information, etc.
¶ Add to
You can only add widgets after you have specified an entity-alias for the dashboard (see Creating an entity).
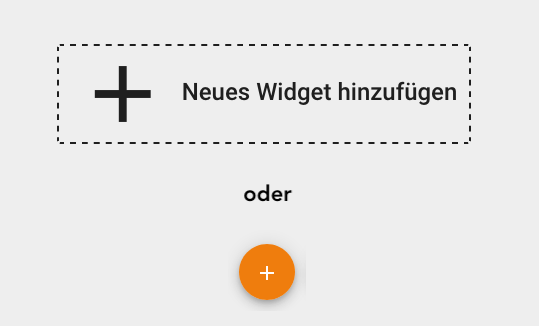
Add a new widget by clicking the icons shown in the image below. The top icon “+ Add new widget” disappears after a first widget has been created in the dashboard. Clicking opens the widget selection window.
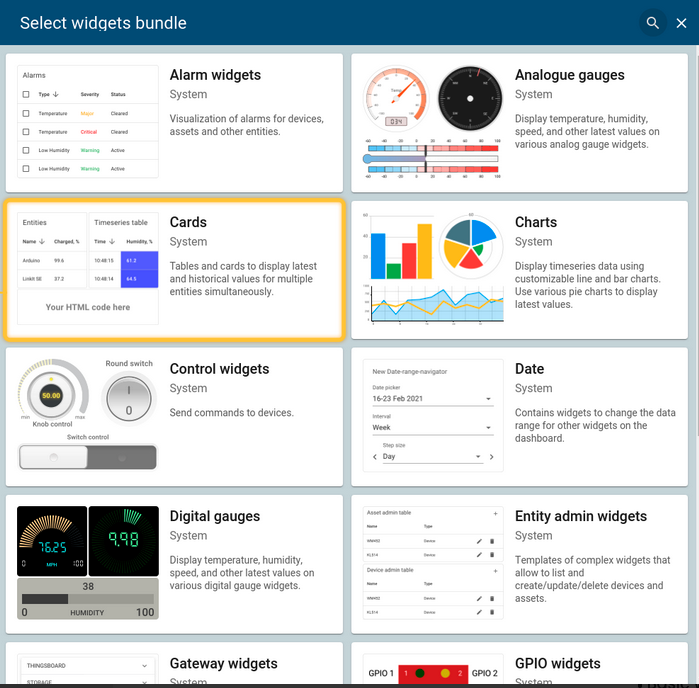
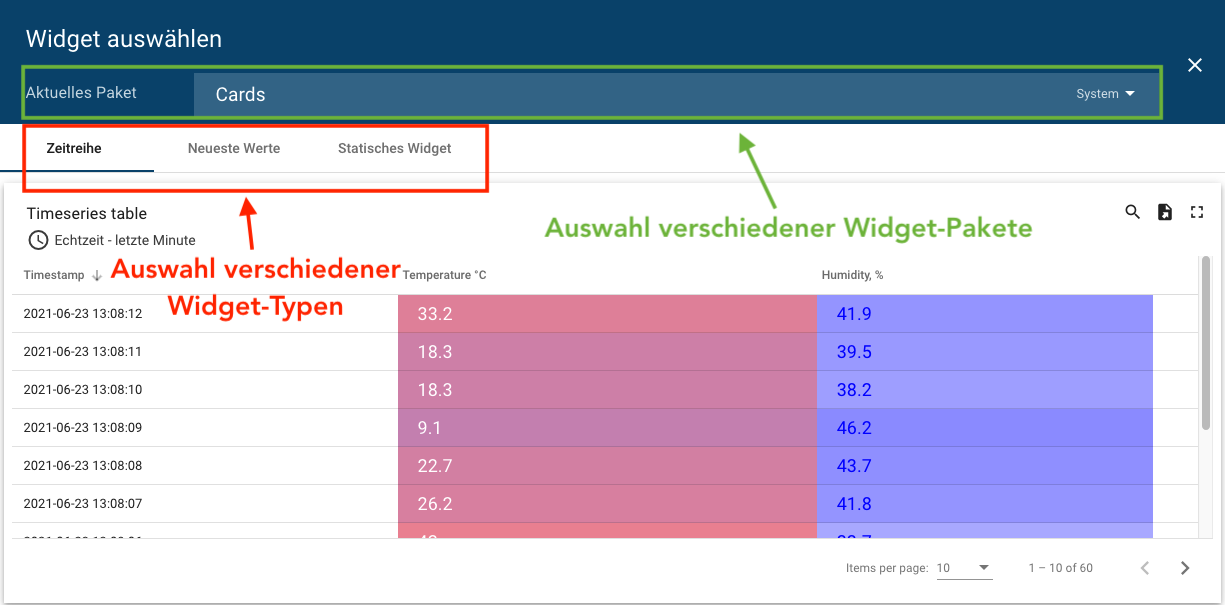
In the widget selection window you can select different widget packages (marked in green). The example below shows the “Cards” package, which creates tabular widgets. The widgets are divided into the different widget types (marked in red). Select the appropriate widget and a widget dialog window will open.
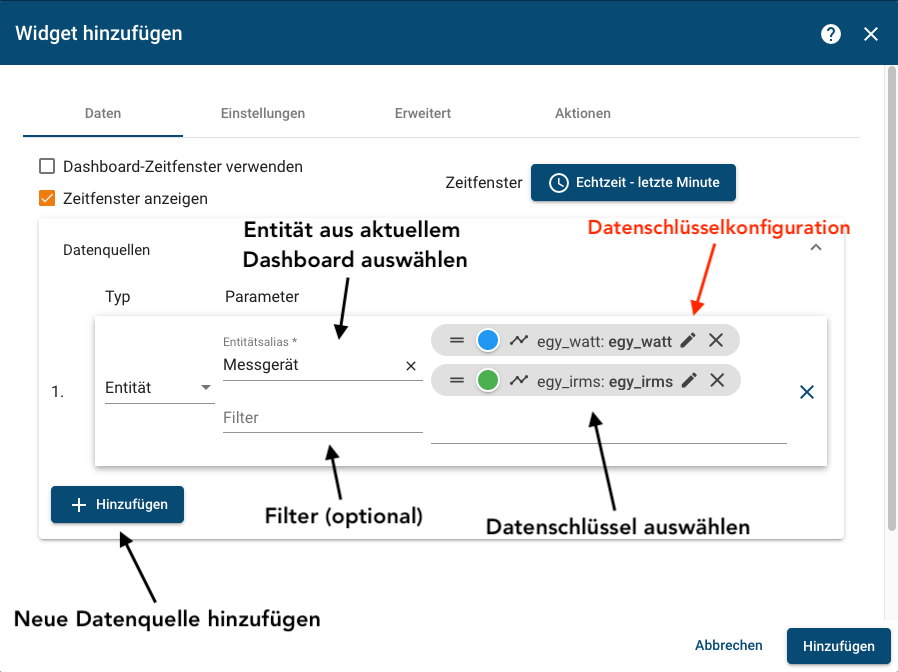
Once in the widget dialog, choose an entity alias for the data source. Then decide on the data keys to be displayed in the widget. Multiple data sources can be added. The number of data sources depends on the previously defined entity aliases in the dashboard. Then click on “Add” to create the widget.
Once you have completed all changes, exit the editing mode by clicking on the tick symbol.

¶ Settings
There are three different places where you can setup your widget accordingly.
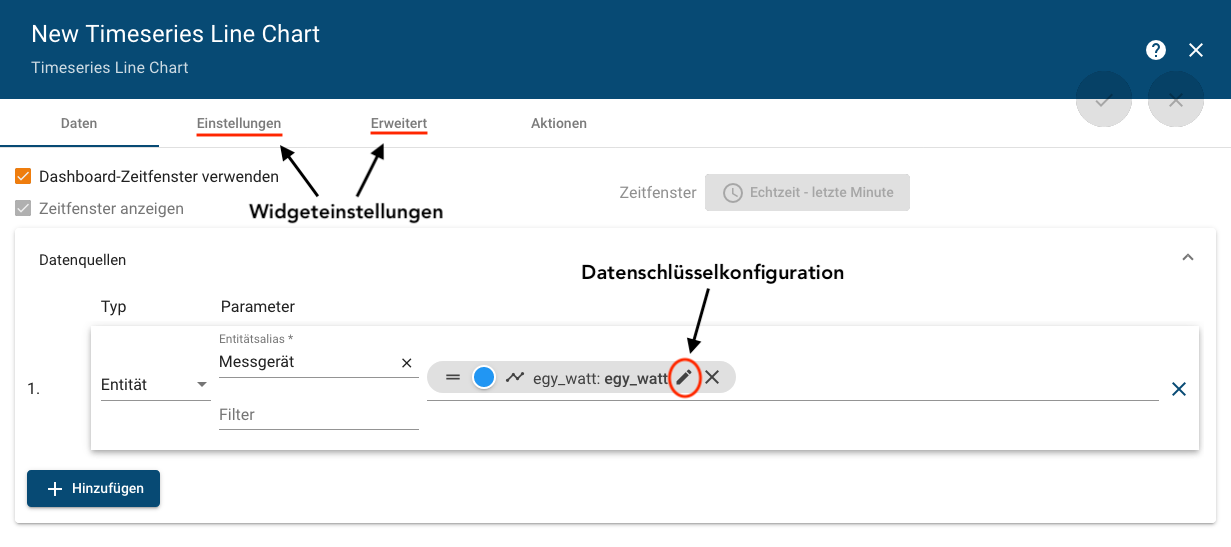
¶ Data Key Configuration
Settings for the data key are made here. You can change the data key, choose your own key label. Include ${entityName} or ${entityLabel} in the label to automatically include the device name/label.
 |

|
¶ Advanced Settings
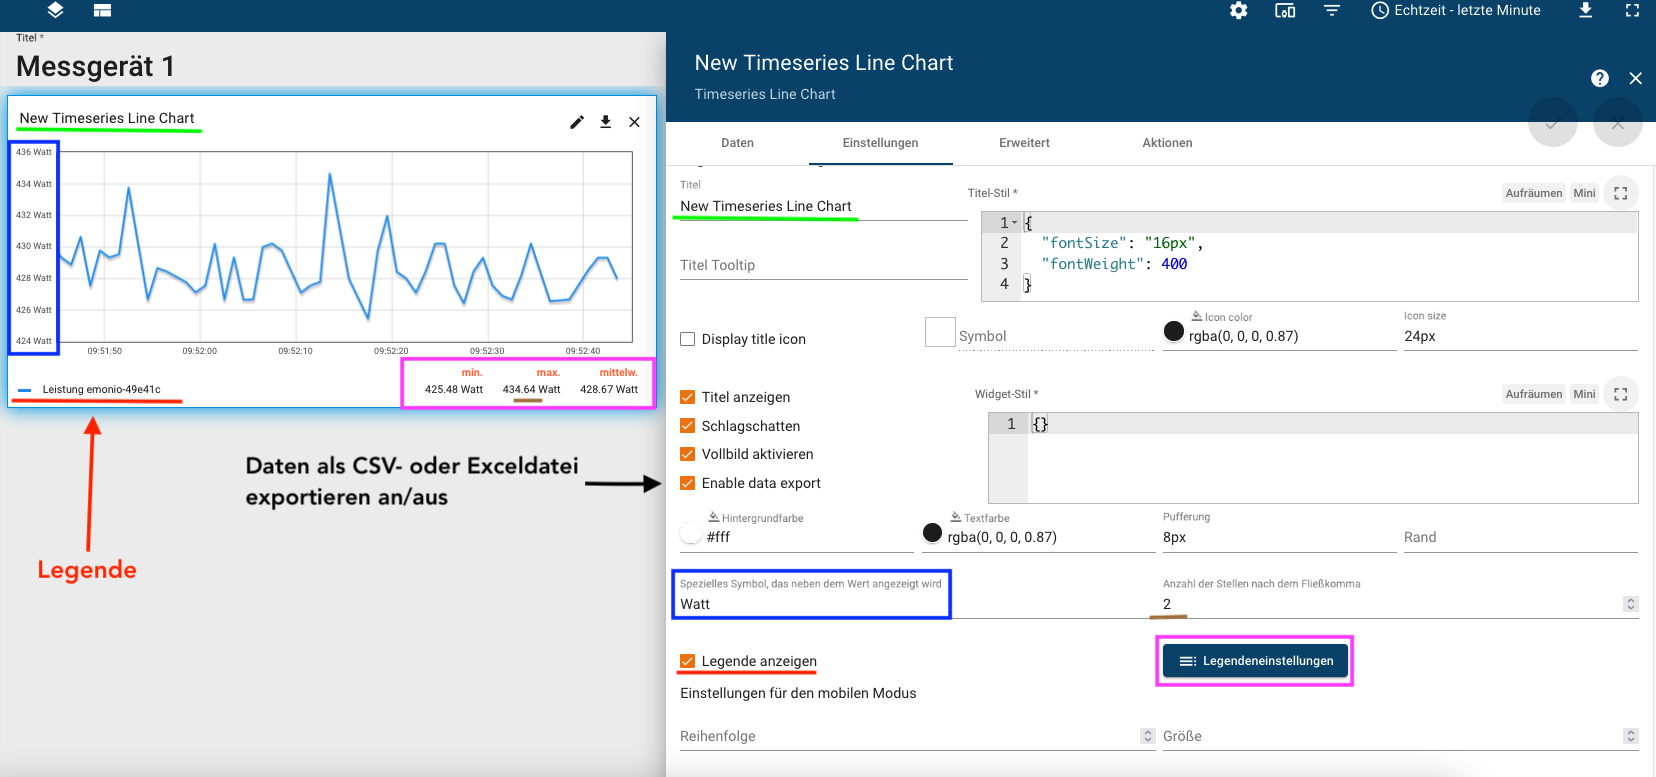
In the settings, titles can be inserted and various functions can be switched on and off, such as data export or legend settings. Under "Advanced" you will find additional settings related to the visibility, style and appearance of specific data key rows in the widget.
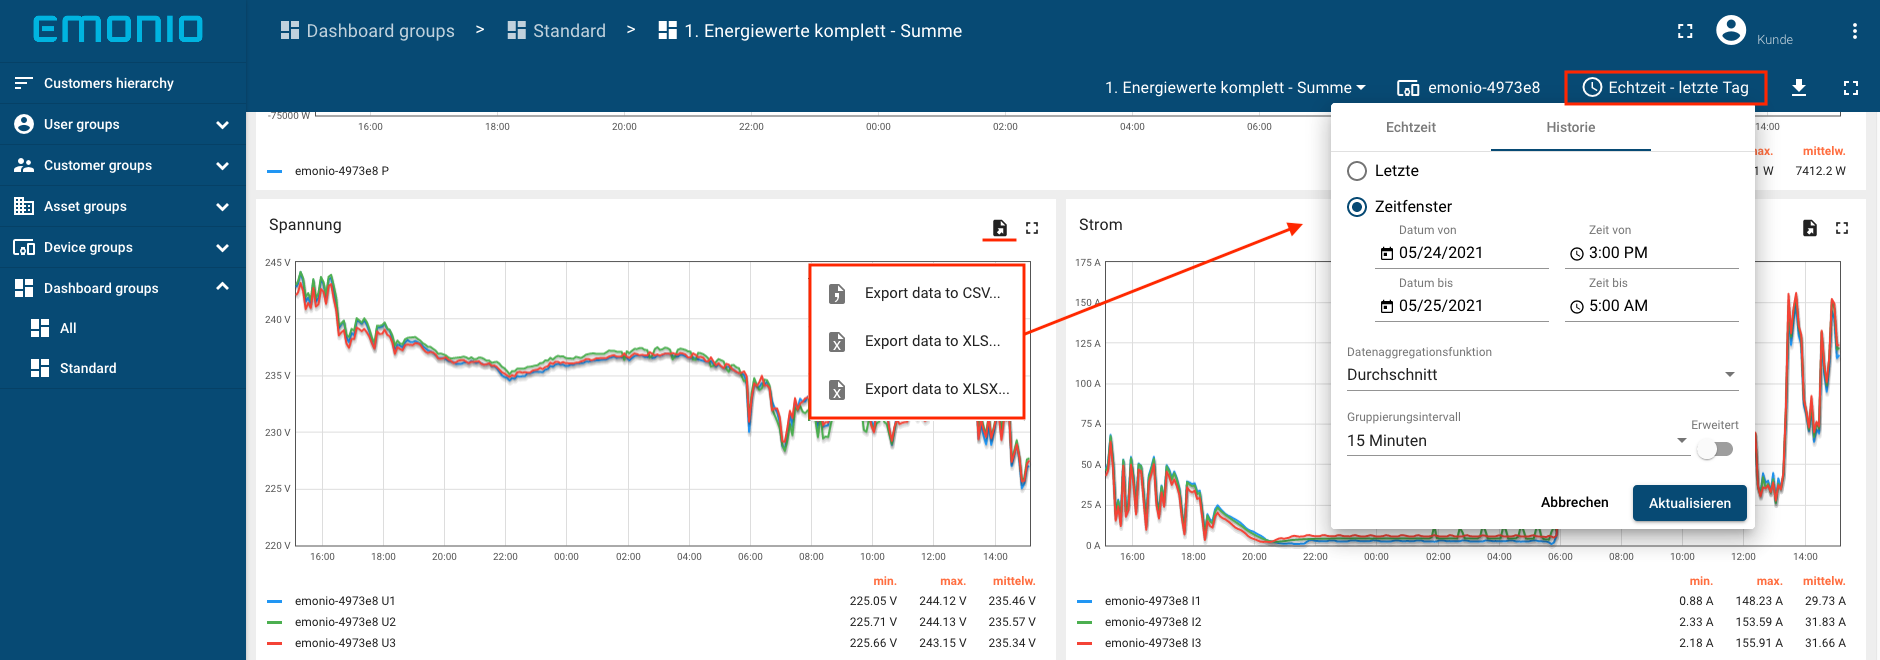
¶ Time Slot Settings
If the widget has its own time slot setting, it is excluded from the time slot settings in the dashboard. The setting options of the widget time slot are the same as those of the dashboard time slot (see 3. Setting the time slot in the dashboard).
¶ Export Measurement Data
The measured values of the widgets can be exported as a CSV or Excel file via the export symbol. Time window and storage interval are determined by the settings of the time window in the dashboard or widget.